 Google Safe
 EN
EN
 FR
FR DE
DE NL
NL ES
ES IT
IT PT
PT Game Giveaways
 D2R Boss Drops

Lost Ark Valtan Gate 1 Guide - Gimmicks, Mechanics & Tips Of Valtan Legion Raid Gate 1
7/8/2022 4:30:22 PM
In Lost Ark, Valtan gate 1 will have 3 bosses and the dark mountain predator. If the Lost Ark Valtan raid still gives you trouble, don't be discouraged. Watch the best Lost Ark Valtan raid guide for gate 1, we will share the gimmicks, mechanics and tips of Valtan.
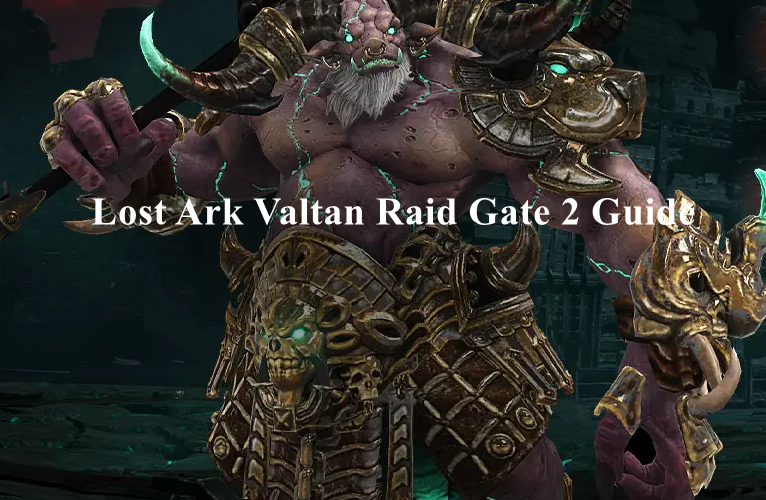
Lost Ark Valtan Gate 1 Guide - Gimmicks, Mechanics & Tips Of Valtan Legion Raid Gate 1
Unlike abyss raid, Valtan legion raids have health bars and the majority of the gimmicks will be determined by hp bar numbers, so it's good to remember them. There will be an important gimmick at 30 and 15 bars. Legion raids also have an esther gauge. Use the Esther skills at the right time. All 8 players need to decide on their positions before the fight. Positions will be 1, 2, 4, 5, 7, 8, 10, and 11 o'clock, you should stand in an earlier position based on your stagger ability. The higher you are, the lower the position number.
Lost Ark Valtan Gate 1 Battle Items & Tips
Battle items are also very important on Lost Ark Gate 1 Valtan. Lost Ark items like time stop, panaceas, sacred charms, and whirlwind bombs will be good to bring. The overall tip is to keep an eye on your buffs and debuff bars and the boss's buff and debuff fires as well.
Lost Ark Valtan Legion Raid Mechanics & Patterns For Gate 1
Phase 1
First, when you start the fight, there will be a predator of the dark mountains, a purple wolf boss. He will have four different phases. The first phase is where he will do his normal patterns at 50-45 lines. The majority of the attacks are frontal, so it's wise to stay at his 5 or 7 o'clock positions. His normal patterns are as follows
Just regular scratch: Literally scratches.
Scratches come forward: Scratch, shoot 3 cones forward. Each scratch and cones do damage.
Low jump scratch to 36: There's also a donut explosion afterward, you need to get close to him after the 360 attacks.
Backstep into flash kick: He spins 180 so where his head is at becomes back. His front got a larger hitbox than his behind. Don't chase him. It is smarter to get away far by his sides.
Crouch to dashing grab: He shows the path before he dashes. Can do 2 or 3 dashes. If you look closely at the floor, his path will show. Make sure to not get grabbed.
Tornado Attack: He summons a tornado with shurikens flying by.
Crouch to exploding aoe attack: He spawns various explosion pools under your feet. Move around to a safe spot before doing DPS.
Crouch to various scratches (also called wi-fi): His back is vulnerable for a long time. Try to DPS here.
Phase 2
If you push your damages accordingly to about 45 lines, then he will proceed to split into two. make sure you stay away from the transformation area because it will do damage to you. When the split transformation is complete, you will find commander Lugaru, the red wolf. You will need to keep an eye on your debuff when fighting with guru. Every time you get hit by a scratching pattern, so you'll get a bleed stack. If your bleed stack becomes three, the stack gets removed and creates a huge line of damage to yourself and your party mates. If players do not take care of their bleed stack you'll see 3 or even 4 lines going across the screen to wipe party mates very quickly. Any cleanse skills or battle items like a sacred charm from party mates and panacea works to remove bleed stacks. The red wolf's additional patterns are bleeding and darkness at a later phase and a large line aoe attack. He summons a huge line of attacks, make sure to dodge this instead of DPS.
Phase 2: Intrusion
In line 40, his partner will come to the battle as well, destroyer Lucas. There will be a notification as well when you appear. When the blue wolf appears on the battlefield. One thing to make sure to know is that these two wolves cannot be close together. If they do, your damage will be decreased by a huge amount. You can find this out by looking at the boss's buffy ui. Two players will also have a mark above their head with the colors blue and red. This is to determine who the wolf is aggro to. Usually, the aggro person is the closest player who hasn't been attacked by his howl. It's the aggro's job to separate the wolves. Usually, pubs divide both wolves into 6 o'clock and 12 o'clock positions. Make sure to communicate which wolves are on which side. An additional control tip is to let the blue aggro player run away to control the boss's positions. This is because if the red aggro player runs far away from the red wolf, he will always use his tornado pattern. Blue wolf always uses dash and grab attacks on the far away player, making it easier to control overall boss patterns in the fight.
It is important to know which wolves are on which side because 4 of the party mates will have a golden buff on their buff ui and around your character. This means you will do more damage to the intruder blue boss. If you do not have this golden buff, you will do zero damage to the blue wolf. There's also an advanced strategy to use esther's thirain to hit both of the wolves because thirain's attack is done in a long line. Party members just need to make sure the bosses are lined up properly. Thirain really helps in this situation because this will cause them to stay in place for a few seconds. Be sure the party is divided properly and deal the damage until bar 35, the blue boss will run away.
Phase 2: Darkness
Eventually, line 35 to 30 is where Lugaru becomes very tricky. He will also apply darkness deep off on you. If you reach 5 stacks of darkness, you will become feared and grabbed afterward. On item level, this often kills most of the players, so this is one of the first DPS checks in Lost Ark. If you do not have enough DPS to push to hp line 30, the difficulty of the battle skyrockets. If you happen to lag DPS, raid leaders using esther thirain control z may help you push those lines quickly to proceed to the next phase.
Phase 2: Stagger Check
Line 30, this is where the important gimmick starts. There will be a notice saying luger is preparing a huge attack. When this happens, everyone needs to go to their preset positions. Lugaru will spawn red and blue orbs. You need to take all eight orbs in an alternating color order like red blue red blue, then stagger check afterward. If these are taken in the wrong order or fail the stagger check, it's an automatic wipe. It is important to take the orbs properly. You'll be doing this mechanic twice, so everyone needs to make sure they focus. There are two strategies to do this properly.
The first strategy: Taking all the orbs and then staggering is the standard procedure. The more orbs you take, the more staggering damage the party does. So you need to make sure all orbs are taken. For example, throwing a whirlwind bomb when only one orb is taken is usually a waste, because you don't have enough bonus stagger damage to Lugaru. So make sure you take all the orbs first and then throw a whirlwind bomb. Only one person can take one orb at a time because you will get a debuff when an orb is taken. If you take another orb during this debuff, you will die instantly. Using a panacea will allow you to take one more or a shining panacea will allow you to take as many as you want during the immune to debuff phase. This is how to solo busters do it.
If you look at the boss's buff bar closely, the purple icon will appear. The number of quirk orbs you take will increase by one. So if the debuff number is times 3, it is your turn to take the orb. If the buff becomes 8, all the orbs are taken properly. If a party member dies, though the mechanic gets significantly harder. Because there are 8 orbs to take care of. Most of the time, the dead person's position is called out and the rest of the party members adjust their positions accordingly. The last person usually dribbles the last 2 orbs. This is why the positions are usually ranked by stagger abilities. For example, if position number 5 dies, people at position 6, 7, and 8 needs to adjust.
So position 6 takes the 5th orbs, position 7 takes the 6th floor and the 8th position which is usually a bar dribbles the 7 and 8 orbs together. Or utilizing a panacea or cleanse can have 1 person take care of multiple orbs, but this will require a lot of communication within the team. If more than 1 person dies, you usually wipe due to lack of stagger. So it is key not to die in the raid because you only have one life.
The second strategy: Use esther wei. What esther wei does is he does a huge amount of stagger damage. You have to make sure your party does enough DPS though. Because using esther wei essentially means you don't need thyrain's additional dps. If you feel that your party does not lack dps, you can use wei to easily pass the orb mechanics. Usually the raid leader takes the orb and spawned esther wei on lugoru to stagger enough to pass the mechanic. By the way, even if luger is staggered, taking the orbs in the wrong order still wipes the party. If people are confused about the orb order, it is usually safer to dribble the orb than to take it. Whichever strategy you do, you must communicate with the team. One person not knowing the mechanic will consistently wipe your party.
Phase 3
After the 30 hp line mechanic, blue wolf destroyer Lucas will fight you. From this point on the patterns are about the same. Your party will need to push to line 15 for the next orb mechanic. The blue wolf does not have a bleed stack, but his aoe damages are very painful. You need to make sure you dodge them all. His unique normal patterns are as follows.
Scratched to 360: This will also have a donut explosion, so if you happen to see him do a 360, make sure you stay closer to him.
Red explosion pool spot: His hand turns red and does a 360 to spawn various small red pools around the map. These explode in a huge radius so you must run away.
Green explosion pull spawn: his hand turns green under the 360 to spawn green fires around the map. These explode in an inside-safe explosion. However, if people are grouped together, the explosion gets stacked up to a point that is impossible to dodge. So you need to control your positions.
Blue ice projectiles: His hand turns blue and does a 360 to spawn blue icicles. These will fire in a star snowflake shape pattern. If you get hit by them it will freeze you. The best thing you can do is to spacebar towards the projectile instead of away. You will get hit but at least it won't freeze you, because you're cc immune. Also since each projectiles are created per person, everyone gathering up in one place helps as well.
Phase 3: Intrusion
About 25 lines, the rival of luger will intrude the fight. Like the 45 line pattern, the strategy is the same. Make sure they're far apart from each other. The only difference is the golden buff will be effective on the red wolf this time, because the red wolves is the intruder this time. As mentioned on the red wool face, it is better for the blue aggro person to control the wolf to be far away from red.
Phase 3: Stagger Check
At 15 lines, the boss will do the second orb pattern. It's the exact same mechanic done at the 30th line.
Phase 4
When you successfully complete the second orb-taking mechanic, the blue wolf locus will proceed to do a long transformation animation. There will be a bunch of projectiles flying at you with 3 rings exploding from the outer area to the inner area. After the final transformation, the wolf will combine into the purple wolf again like the initial start of the fight. The purple wolf will have both the red and blue wolves' normal patterns and unique patterns. With additional grab attacks and gravity fields, these do a significant amount of damage. So you need to be careful. In the last phase of Gate 1 Valtan in Lost Ark, the purple wolf also has additional mechanics. About every 2 minutes, he will smash the ground and fear one party member and disappear.
It is usually the farthest position member from the boss. It is important for the feared player to let everyone know he is feared because the boss will appear behind them and proceed with a stagger check. Make sure to spam that ping to let everyone know that position. The first stagger fell will do huge damage to the feared player usually in death. But the second fail will result in a team wipe. For a special tip keep an eye on the boss's stagger bar. When he proceeds to cast a fear mechanic, the stagger bar will turn into a lock sign. So if a targeted player either presses the space bar or an awakening, he can ignore the fierce cc to skip the mechanic. This happens because space bar and awakenings are both cc immune. Solo-carrying runs usually do this to avoid the mechanic.
This concludes the Lost Ark Valtan raid guide for Gate 1. We hope this guide helped you to hopefully clear the first gate of the Valtan raid.

Game Giveaways

Lost Ark Related News
-
 Lost Ark Event Guardian Raid Guide 2023 - Raid Rotations, Rewards, Tips & Make Gold5/19/2023 11:41:43 AM
 -
 Lost Ark Hanumatan Guardian Raid Guide: Release Date, Ilvl, Rewards, Mechanics & Tips3/23/2023 11:59:14 AM