 Google Safe
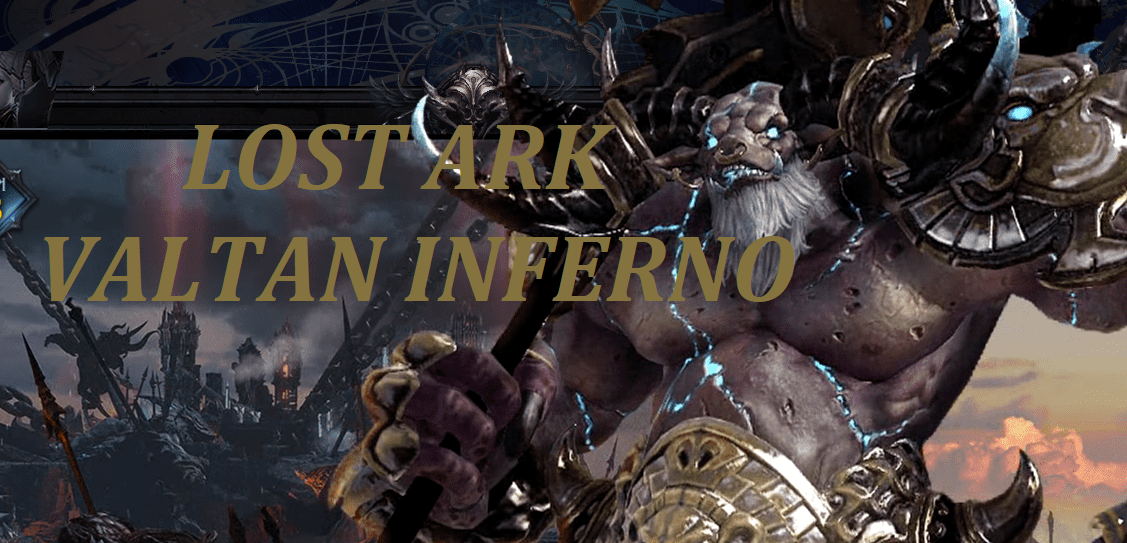
With the July update, the Inferno difficulty mode of the Valtan Legion Raid was added to Lost Ark. Here, we guide you walkthrough the Valtan Hell mode by breaking down new patterns and mechanics of the Inferno raid Phase 1/2, as well list the rewards you are able to get after fully clearing.
Differences Between Inferno Mode with Normal/Hard Mode
The biggest difference between Inferno and Hard is that Scale of Balance is applied. And since the raid calls for the usage of the Book of Coordination, everyone's equipment is normalized against the level of your Legion Commander opponent.
You can play Valtan on Normal/Hard and Inferno in the same week, and you are free to try Inferno as many times as you wish because Inferno mode won't count towards your weekly attempt limit for Legion Raids.
You cannot reach halfway and return at a later time during the week since the gate progression mechanism will not be in operation.
Inteading of mats, gears, gold, Valtan Inferno rewards achievements, Stronghold, titles, cards and other things to honor your wins
Relate Read:
Lost Ark Kakul Saydon Rewards - Clown Rehearsal, Normal, Inferno Raid Drops & Loot Bid Rewards
Lost Ark Valtan Inferno Rewards
Before diving into the raid guide, let's take a view of the rewards for fully clearing:
Title - Commander of Beast Slayer
Card Item - Valtan
Commander's Subjugation Seal - Beast Beast's Power
Territory Installation - Baltan, Ruler of Demonic Beasts
Challenge Achievements & Title
Silence on the turbulent earth - Defeat Beast Commander Baltan at the Heart of the Resurrected Beast.
Huh... it's nothing - 1 Defeat 'Predator of the Black Mountain' in the final phase of the gate within 2 minutes.
Where do you crawl! - 2 Defeat the 'Lord of the Torn Beast Beast' in the final phase of the gate within 2 minutes.
Invincible Raid: Beast Commander - Break through Normal and Hard difficulty by surviving all without retrying.
The ruler of the Black Mountain, sleeps here (Reward: Title - Beast's Roar) - Break through Hell difficulty with survival without retrying.
Lost Ark Valtan Inferno Raid Gate 1, 2 Guide (Patterns & Mechanics)
Since Lost Ark Valtan Inferno is very difficult, you will need as much preparation as possible to clear it:
Lost Ark Valtan Inferno mode aka Hell mode, like Hard mode, can be entered at level 1,445. So if you want to try the Hell mode, you need to have a character with 1445 gear level.
Pet and food effects are not applied in Baltan Hell difficulty. Also, since the vitality obtained from ability stones is not applied, the tier and grade of the ability stone are irrelevant, and equipment sets, skill runes, tripod levels, and gem effects are not applied. Therefore, it can be said that there are only two ways to raise your specifications: combat skills and engraving.
As the specifications are corrected, not only had to attack all patterns accurately, but also the strength of the boss that leads to fatal results even if one mistake is fatal, and additional patterns that make the existing attack useless, you can feel more fun than when you first meet the bullet. But no worries, keep reading, we will go over the patterns and mechanics in each Phase of Valtan Inferno Raid to help you survive and fight easier!
Valtan Inferno Gate 1 Pattern, Mechanics & Fight Tips
For reference, Inferno Gate 1 differs only in tactics, there is no difference from Normal/Hard. The same tactics can be used in normal/hard pots that lack deals.
Battle Items and Character Preparation
Valtan Inferno is basically the same correction raid as 'Trial Acates', and the maximum attack power and attribute sum are corrected. Gems, cards, food, etc. do not apply. Only skill level, engraving, and corrected characteristics are applied.
In Phase 1, Battle Items required:
DPS: Elemental HP Potion, Sacred Charm, Dark Grenade, Atropine Potion
Support: Elemental HP Potion, Sacred Charm, Dark Grenade or Whirlwind Grenade,
If you are having trouble managing your HP, use the Elemental HP Potion, Luterra's Horn or Stimulant. Mostly, Leagion bosses employ critical strikes to quickly push neutralization, and Awakening DPS often employ tactics that drive synergy at the timing of incapacity to deal damage. If possible, be sure to include a spearman in both parties. For Specialized characters, wear the Weight of Destiny card set to increase your Mastery level.
Pattern & Mechanics
Black Mountain Predator (Purple): 50-46 bar
There are no additional patterns. At the same time as starting, it deals with synergy and (Awakening Dealer) Awakening without a battem. If the proportion of Awakening Dealers is high, it will be 46 lines.
If the deal is ambiguous, it is better to create synergy by bursting the weak deal and incapacitation after awakening.
When the HP reaches 46 lines, the neutralization gauge is locked, and it moves to the center and splits.
Leader Lugaru (red): 46-30 Bar
Bleeding stacks are accumulated when hit by a scratch attack, and disappear when 3 stacks are reached, and a straight board is formed in a straight line between the target and the boss.
It's very painful and it interferes with dealing, so let's do the purification/voice call right away without getting hit as much as possible.
Controls disabling. Just swipe the letter 'ya' below the neutralization gauge.
If you push the neutralization too quickly, you will have to deal a damage cut. Only DPS will deal cuts at the right time for each party. It's best if you've been pushed to 'Hey' at the time of intrusion.
When doing a damage, 'Lucas the Destroyer' breaks in, and the 'Bond Break' buff is given to 4 people.
- Target of the intruded boss: The character who first hit the boss among those who are subject to the unity buff
- Existing boss's target: This is the first character to hit the boss among those who do not have the bond buff. It lasts for 30 seconds. (If not, the closest character)
Leader Lugaru (red) is careful to cast a tornado when the target is too far away. It is recommended that the blue target go to the other side of the map as much as possible. The mark is maintained for 30 seconds, and when the mark disappears and the target changes, it howls and stands still. You can fix the purification/voice robo switch at the required timing. One party member with the same target, ready to write the voice!
If the neutralization of red is managed up to 'Ya', howling is induced, and if you hit two with Shilian at the same time, the intruding boss will immediately run away.
Whirlwind immediately after escaping - Since the raid pattern is used with a very high probability, avoid the tornado pattern from a distance and neutralize it when the raid pattern is complete, and add awakening with an atropine potion.
Note:
In patterns where provocations do not work (attack pattern, pork belly, etc.)
The incapacity gauge is not deducted. When the raid pattern is completely finished, put in the neutralization skill
Do not use the main weapon for neutralization purposes
It's a good time to throw fire grenades for neutralization purposes at this time.
The machinists who employ broken bones trust their allies and throw energy jade in advance during the raid pattern. If you do it wrong, you will end up incapacitating and enter.
When the neutralization gauge is locked, a red binding pattern appears after a while.
There is no difference from Normal/Hard, and considering that each time you eat a orb, the amount of neutralization damage you receive increases, you can save the synergy with the main machine, neutralize it, and serve the synergy immediately afterward.
Lucas the Destroyer (Blue)
Immediately after emergence, use the sprinkling pattern. Check the color you wear on your arm.
It sends waves twice and spreads a slate, so you just need to gather at one point and avoid it to one side. The way to avoid it is the same. Note: This pattern doesn't do taunts and doesn't neutralize.
When avoiding the ice field, it is good if the Warlord blocks the Spero from the back. Bard-Suho's performance is also good.
If you only pay attention to the occasional tossing of a rug one at a time (especially an icy tile)
Other than that, there is no difference from red in terms of tactics, after the neutralization pattern.
When hit by that wave, a slab is created, so the Warlord blocks the wave with his body and the other personnel dodge at 6 o'clock.
Black Mountain Predator (Purple)
Just like blue, it casts Scattering when it starts. The key is to induce the fear target, which is the character furthest from the boss.
With a high probability, it is used immediately after the second sprinkling pattern, and every subsequent sprinkling pattern (approximately 50 to 70 seconds apart) is used, so you need to adjust it so that it is not farther than the Warlord during the pattern.
If you repeat the synergy driving immediately after the fear, it is usually cleared at the second fear level.
At the timing of fear, the neutralization gauge is locked like this, and the neutralization value is reset.
If you are immune to status abnormalities at this time (during guardian's performance, awakening, or special battle), be careful because the fear is chewed and the timing of the deal is blown away. There is also a way to aim for steaming ineffectiveness by chewing more times.
If the damage is not enough, caster Sidereal:Thirain as soon as the gauge is filled in the blue boss, regardless of neutralization.
In the purple stage, you can use Sidereal:Thirain immediately after getting the gauge (it does not move for about 8 seconds during the sprinkling pattern, so you can use it). Sidereal:Thirain fills up just before the rampage.
Valtan Inferno Gate 2 Patterns, Mechanics and Fight Tips
Unlike Gate 1, where there is no difference at all, there are many differences, such as the inability to see the range of some patterns, the addition of poop in some patterns, and the gimmick that increases the difficulty. And above all, among those who go to Valtan every week, few people know how to break all gimmicks and patterns, so it will feel even more difficult.
Battle Items & Character Preparation
DPS: Elemental HP Potion, Destruction Bomb, Dark Grenade or Flame Grenade, Time Stop Potion
Support: Elemental HP Potion, Destruction Bomb or Corrosive Bomb, Dark Grenade or Flame Grenade, Time Stop Potion
There are 4 things you need to do in advance:
Place to avoid poop [Click to move to the corresponding gimmick]
People with similar backgrounds stand together, those who play separately are in the center.
Lonaun Bead Constellation
11 o'clock, 1 o'clock: Jobs with a lot of mobility
7:00: Supporters
You can do that enough. It is decided who will eat above and below for each seat.
Ghost Fire [Click to move to the corresponding gimmick]
Normal number x3. The party opposite the Warlord eats first.
Warlord and one other, swap each other at 1:00/3:00
5 counter [Click to move to the corresponding gimmick]
No. 1 and 2: Jobs that can be countered at all times (spearmanship, walrus)
4: Occupations with good counter performance (spearmanship, walrus)
5: Warlord, if the Warlord proficiency is low, 1 person enters as an assistant.
Patterns
It explains mainly the Valtan Inferno patterns that are different from Normal/Hard:
Normal pattern
The hit range of some patterns is not displayed. It is required to memorize and avoid previous actions.
A 'vertigo' debuff that significantly reduces movement speed has been added.
In the Whirlwind pattern, an explosive pad is created under the feet of the raid member and the 'vertigo' debuff is given when being hit multiple times.
The damage of rotary slash is greatly increased in 2 consecutive slashes, and the 'vertigo' debuff is given when you get hit from inside, so you have to dodge it before entering.
A whirlwind attack without foreshadowing has been added.
Phase 1
Increases the speed of the ax blade bombardment and causes strong stiffness. It is even dropped into the safe zone at the end of the bombing.
Phase 2
The number of people in bondage increases.
After the awakening period, aim once more quickly in the tombstone avoidance pattern and shoot the sword.
The ghost fire sphere acquisition pattern is cast once more.
Silence + consecutive counters appear even before terrain destruction, and damage has been greatly increased, and the number of requests has been increased to 5. You have to pass them by countering them alternately, and be careful of the straight-line slab that is created when the absorption of the ghost fire sphere is slow.
Phase 3 (Terrain Destruction)
Commander's Awakening - Crusher's counter attack check is randomly changed each time it prepares to charge. In the case of the first charge, the judgment remains until turning toward the target after rushing, so it is possible to break it by inducing it to hit the wall and then hitting it at the head attack position.
Final Phase (Lord of Torn Beasts)
The 'immortal' stacks that need to be removed are 8 before the nerf patch.
The charge trajectory of the clone generated from the outside was fixed in a triangle and the cycle was shortened.
Unlike Normal and Hard, if you enter the Berserk state, the chance of clearing is lowered.
NOTE: Most of the content in this article is translated according to the Korean guide, and the names and proper noun may be quite different, we will keep updating here.

-
 Lost Ark Event Guardian Raid Guide 2023 - Raid Rotations, Rewards, Tips & Make Gold5/19/2023 11:41:43 AM
 -
 Lost Ark Hanumatan Guardian Raid Guide: Release Date, Ilvl, Rewards, Mechanics & Tips3/23/2023 11:59:14 AM
 EN
EN
 FR
FR DE
DE NL
NL ES
ES IT
IT PT
PT
 Game Giveaways
 D2R Boss Drops
 D2R Drop Rank


