 Google Safe
 EN
EN
 FR
FR DE
DE NL
NL ES
ES IT
IT PT
PT Game Giveaways
 D2R Boss Drops

Elden Ring Best Ghiza's Wheel Inquisitor Build Guide (150 Level): Stats, Talismans, Gameplay Tips
8/8/2022 12:51:51 PM
In this guide, we break down the best level 150 inquisitor build - a strength dexterity quality build that uses the Ghiza's Wheel weapon to great effect.
Elden Ring Ghiza's Wheel Build Guide - How to Build Up Strength Dexterity Inquisitor Build?
With the spinning wheel weapon as the main hand weapon, this build is going to focus around using one-handed R2s and charged R2s in order to deal increased damage to enemies and to trigger Elden Ring items like rotten wings sword insignia on them, hemorrhage on them to boost your attack power higher and get the most out of those r2s and charge r2 attacks.
Stats (150 Level)
Vigor: 50 - Give you enough health to survive hit
Mind: 13 - Literally don't need hardly any mind with this build contagious fury costs like 9 FP or something last 30 seconds and that's literally the only thing you spend FP on in this build because all the rest of your damage comes from block counters or charge r2 or r2 attacks, so you absolutely need no points in mind whatsoever
Endurance: 34 - In order to give you enough equip weight that you can use all this stuff and still medium roll, and also to give you more stamina when you're blocking, so that you can block counter and still have stamina left or you can keep swinging this weapon because it chews through a lot of stamina when you attack
Strength: 50 - This weapon scales very well with strength and dexterity about evenly we would say so, we've hit the breakpoints here of about 50 of each.
Dexterity: 50 - If you're using milliseconds prosthesis then you only need to take dexterity up to 45 that would free up five more points for something like endurance, but otherwise you want to keep these about 50 and then you'll take these up to 80 if you play this build into NG plus.
Intelligence: 9
Faith: 14
Arcane: 9
You could have 25 faith in this build and go like Golden Vow and Flame Grammy Strength if you want. If you don't particularly want to keep buffing with them since you already have to buff with jellyfish shield as it is that's an option if you want, but we just recommend having those as low as possible.
Weapons
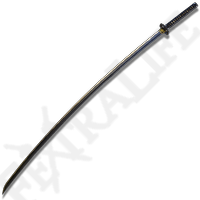
Main Hand Weapon: Ghiza's Wheel
The spinning wheel weapon skill of this weapon does not function the way you would think. When you use it on an enemy by holding L2, it hits them over and over but the game does not consider these separate attacks, it only considers it like one attack or it considers it separate attacks, but it doesn't trigger things like Rotten Winged Sword Insignia or Millicent's Prosthesis, which means that you're not gonna get like increasing damage with each rotation of that like you really should.
Additionally, it doesn't really trigger bleed build up the way you'd think it was, we think it does a percentage of the blood loss buildup of the weapon each spin instead of the full value or even like a not even half - it does like maybe 10 to 20 percent of the buildup per rotation, which means you really have to hold it on an enemy a very long time in order to trigger bleed build up high enough to trigger hemorrhage on them if you're using the spinning wheel.
Essentially this makes this weapon skill pretty much useless, you're not going to be able to go up to an enemy and just hold this on them maybe if you stun lock them long enough to kill them when you're not able to do it like on a boss or any you know meaningful difficult fight.
However, if you use the R2 attack either two-handed or one-handed, the blades will actually spin at the end of that attack, and they will trigger extra ticks for blood build-up and extra ticks that will proc rotten wing sword insignia or wing sword and Sydney, etc, so these are what you want to go for and because the one-handed moveset actually makes the weapon spin in front of you. Compared to the two-handed moveset that makes it spin behind you, you're primarily going to want to use it one-handed because you just want it to land on the enemy in front of you and keep spinning on them.
Off Hand Weapon: Jellyfish Shield
On the off-hand, we have a great shield that allows you to do block counters but what's really great about the jellyfish shield is that it also boosts your damage by 20% with its buff and it has a very low FP cost. So not only can you use block counters very effectively with this build but you can also buff the damage of that r2 even further which makes it a fantastic pairing for this build.
Armors
Beyond that, the armor that you use for this build isn't super important. You're not going to have enough equip load to use a very high poise armor because you have a great shield equipped and a colossal weapon equipped. So you're not going to be able to use like super duper armor out there unless you want a heavy roll which is fine, but it's not super important because the r2s and charged r2s of this weapon typically give you hyper armor anyway and you can usually poise through attacks even without high poise armor. But you could use White Mask for your armor
that would give you even more attack power.
Talismans
When it comes to the talismans for this build, there are three that we basically keep slotted the whole time:
Claw Talisman or Ritual Sword Talisman
We suggest basically switching between the claw talisman or the ritual sword talisman and that's because sometimes you want to do jump attacks with this weapon and get a little bit more damage out of it, it's a very strong jump attack it usually staggers enemies for a second, or makes them flinch allowing you to follow up with an r1 and you know finish them off. Or use ritual sword talisman to also increase r2 attacks even more. Particularly when you are handling like trash areas of the game, maybe you don't have just enough damage to one-shot enemies, this will make sure that you do it really depends if you're fighting tough enemies sometimes you're not going to be at full health the whole time, and ritual sword talisman isn't as good but sometimes you just don't get hit and also because you're using a great shield and you're going to be able to do block counters.
Rotten Winged Sword Insignia or Millicent's Prosthesis
Rotten Winged Sword Insignia or Millicent's Prosthesis whichever one you have is going to increase your damage, as you hit rapidly and this works well with this weapon because of the spins of the blades that's unique to this weapon afterward, otherwise we wouldn't recommend these on a colossal weapon build because they attack very very slowly. The reason Millicent's Prosthesis is probably the better of the two options here is because it gives you five dexterity which would then free up five points to put in something like endurance. You need a lot of stamina with this build because you are blocking and the shield you're blocking with doesn't have great guard boost, and attacking with gloss weapons consumes a lot of stamina, so having high endurance is not only good for better armor but also good for stamina, so being able to free up those five points can give you a little bit more endurance.
Axe Talisman
Axe talisman is there because charged r2s are going to be your primary means of damage this will boost your charged r2s not your regular r2s, but you're going to be using those charged r2s a lot to get you to know even more damage and more stagger out of them, so it works really well in this build.
Lord of Blood's Exultation
Lord of Blood's Exultation is really good because you're going to proc hemorrhage very easily due to the rotations of that blade, and then that'll boost your attack power even higher
Wonderous Physick Mix
If you're using the flask of wonders physick, you want to use two tears:
Use one such as Spiked Cracked Tear that increases your charge to attack damage
Use the one that increases such as Thorny Cracked Tear your damage on successive attacks
If you don't have either of these is the Greenburst Crystal Tear which will give you stamina recovery - stamina recovery is absolutely phenomenal and anytime you're blocking getting more stamina recovery is good because you go through, when you do a block counter, you not only go through the stamina to block but then the attack and you go through stamina very fast.
Gameplay Tips and Strategy
The strategy with this build is going around the landscape doing block counters on trash, typically one shotting them if not then you can follow up with a critical strike because you usually stagger them in one block counter, but then using r2 or charged r2 on enemies to trigger that build up from like Rotten Winged Sword Insignia or Millicent's Prosthesis. You could use both Millicent's Prosthesis and Rotten Winged Sword Insignia if you have it as well in tandem with this build to get even more build-up if you want, it's not absolutely necessary but it would absolutely give you more damage. The reason it's important to trigger this right away is that that buff only lasts a small duration, so if you go from enemy to enemy keep using this then you'll keep that buff up and you'll keep your damage high, allowing you to just keep chewing through enemies as your damage gets higher and higher.
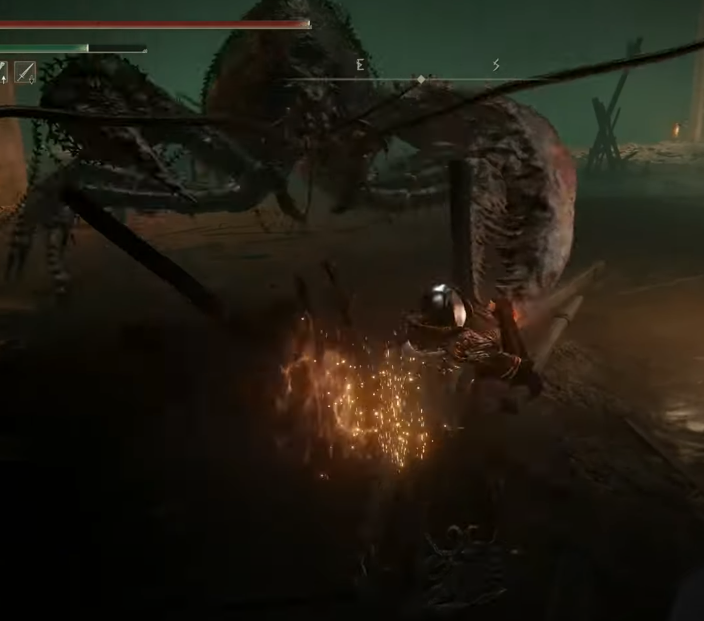
When you get to tough enemies and bosses, usually what we try and do is get like charged r2s off, dodge their attacks, and end up in a position. If we can't get a charged r2, we get a regular r2 because the wheel will still spin, but if we can we'll try and get a charged r2 and or do jump attacks because once they're staggered and an enemy is down on the ground then you can do that charged r2 while they're laying there, and hopefully get really big damage numbers from that charged attack because sometimes you can hit from three to four thousand damage with a charge or two with this weapon, depending on how many buffs you have up from triggering hemorrhage or from hitting repeatedly already.
Block counters are definitely harder to pull off against tougher enemies because usually they're very aggressive or they don't bounce off your weapon, sometimes you're fighting like a dragon block counters are just not an option. So usually you're going to be doing jump attacks against tough enemies or you're going to be going for those r2 and charged r2s.

Game Giveaways

Elden Ring Related News